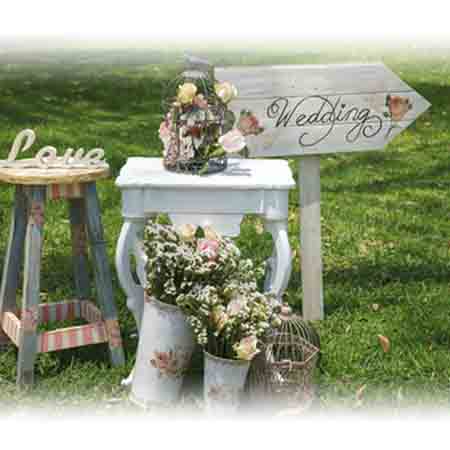
Fun Do-it-Yourself Ideas for Brides
When planning an event, especially a wedding, it’s always a little surprising how quickly expenses can add up. After allocating costs for the venue, photography, and food, you are left with pennies in your budget with an entire wedding left to plan. Not to mention, you need to pay for your stunning dress and you and your spouse’s wedding rings! As today’s average wedding cost creeps over the $25,000 mark, it’s no wonder that some brides are deciding to take the little details into their own hands.
Penny savvy do-it-yourself projects will not only save you money but provide a fun and unique way to customize your wedding into an event that is truly your own. While there are some projects you may want to leave to the professionals, here are three fun projects you can easily do yourself. Be sure to read through to the end for a few other quick DIY ideas!
1.) Floating Carnation Backdrop by "A Practical Wedding"
Don’t be intimidated, this project is a lot easier than it looks and will add beautiful detail to your wedding celebration.
Supplies:
- Carnations
- Fishing line
- Scissors
- A few heavy-duty embroidery needles
- Something to hang your flowers from (A wedding arch, a tree branch, gazebo, etc.)
Directions:
Step 1. Cut the flower stems, so they are short and separate the flowers into piles. The number of flowers you choose to string may vary depending on the desired length of the fishing line. This particular site recommends 15 per pile, but some brides will choose to use as little as 6.
Step 2. Measure and cut the fishing line to the appropriate length. Keep in mind, you may want to give yourself a little wiggle room. You will need a little extra space at the top of the string to secure it to your desired structure.
Step 3. Thread your needle through the stem of the carnation, and out through the center of the flower. Secure the flower in place by tying a knot on the other side.
Step 4. Repeat this sequence: Line—knot—carnation—knot—line. Do so until all flowers are have been threaded, then secure the line by tying a knot at the bottom.
Step 5. Repeat steps 2-4 until you have filled the size of space you are decorating.
Step 6. Secure your lines to your desired structure and cut off any excess line you don’t need.
Tips:
- Beware, your fishing lines can become easily tangled. Store the various lines neatly by placing them into individual plastic bags.
- Give yourself enough time to do this project. While the tasks are fairly simple, you may want to ask your bridesmaids to give you a hand. Many hands make for light work!
- While carnations are hearty enough to last up to 4 days, you may be able to stretch out this timeline by refrigerating your flowers or placing their stems in water to prevent them from wilting.
2.) Here Comes the Bride Sign by "Something Turquoise
Ordering signs for your flower girl or ring bearer to hold when walking down the aisle can cost you upwards to $60-$100.00. This incredibly easy project costs less than $30.00!
What you will need:
- One piece of finished wood of your size choice (This project uses an 11 x 14)
- Chalkboard paint
- A foam paint brush
- Chalk or a chalk pen
- Glue (optional)
- A cheap drawer pull (optional)
Directions:
Step 1. Paint the front side of your sign. You’ll want to do two coats, allowing for an hour of dry time in between.
Step 2. (Optional) After your two coats are completely dry, pick a spot for your handle that will be easiest for your little attendant to carry. Secure the handle by using a generous amount of glue. Allow 24 hours of dry time for a nice seal.
This step is optional because your little one can easily carry the sign without the handle, but it is a nice addition and may make the sign easier to carry.
Step 3. Repeat Step 1 and paint the back of the sign making sure to cover all of the nooks, crannies, and edges your sign may have.
Step 4. Prep your chalkboard sign for writing by dragging the side of a piece of chalk down the length of your board. Wipe with a dry towel when done. This adds some much-needed chalk dust to the surface that will make it easier to write on!
Step 5. In your best handwriting, simply write, “Here comes the bride.” You can even personalize it with a custom message if you wish!
Tips:
- Don’t stress over imperfect handwriting. This is what makes your project so unique!
- Keep this project a surprise as a fun added detail that will make your soon to be spouse smile during the wedding.
3.) Mismatched, Gold Spray Painted Vases by "Wedding Chicks"
Who ever said your flower vases had to match or cost you a fortune? This penny-saving DIY will help you create a collection of flower vases that is sweetly unique. Your friends will be dying to know which Etsy shop you bought them from!
Supplies:
- A collection of glass vases
- Gold spray paint (or any color you prefer!)
- Tarp or cardboard
Directions:
Step 1. Curate a collection of glass vases from local thrift stores and garage sales. While you want them to be different, you still want them to have certain similarities. Don’t get too crazy here.
Step 2. Spread out a tarp or large piece of cardboard to paint on and get spraying! Be sure to do this project outside or in a well-ventilated area.
Step 3. Shake your bottle well and apply 2 even coats, holding the can about 6 inches away from your vase.
Step 4. Allow appropriate time to dry and simply add your flowers!
Tips:
- Be sure your vases are properly sized to fit your flowers.
- This is an easy task to delegate to a friend. Or, host a DIY prep night where all your bridesmaids come and help you with your various projects.
Other DIY ideas:
- Welcome signs to direct people where to go
- Seating chart and place cards
- Homemade goodie bags for guests
- Hand-made invites (only if you are keeping it simple!)
- A fun trail mix, candy or coffee bar to entertain guests before the reception
Have fun, but don’t get carried away.
While it may be tempting to surf Pinterest for your next DIY fix, it’s important not to get in over your head. Remember, you want to minimize stress on your wedding day so it may be best to leave certain projects like your bouquets and cake decorating to the professionals. Unless you are especially talented in these areas of expertise, it’s not worth creating stress over a do-it-yourself project gone wrong.
Taking the little details into your own hands means taking on projects that are fairly simple to complete, saving money, and having fun with close family and friends. DIY projects are a great way to feel involved in the wedding planning and gives you a way to make sure you capture the special details you dreamed of.
Let us know what DIY ideas you’re trying and if you try out any of these suggestions! We’d love to hear the unique spin you put on your day!
Share This Page: